Using Cyberduck with S3
In my previous post, I mentioned that I am moving away from WordPress for my personal blog in favor of a static publishing tool (currently Pelican).
The downside of static tools is that they require a change in workflow. You can't just write a post and hit publish. You have to write a post, then run a script, then upload these newly-generated HTML pages.
It's possible to automate the uploading part with a script. And one of my personal coding goals for the year is to write one using Python. In the meantime, I am using Cyberduck. Firefox users may be interested in the S3Fox Add-on. Though this post will focus on Cyberduck, instructions are more or less the same for other file transfer applications.
Create an S3 group
The first step is to set up an S3 permissions group. That's easy enough.
- Log in to the Amazon Web Services management console.
- Under the Deployment & Management column, click the IAM link.
- On the Welcome to Identity and Access Management screen, click, Groups.
A screenshot of the group creation screen from the Amazon Web Services management console. - Click the Create New Group button, and enter a group name.
- On the Select Policy Template screen, scroll until you see the Amazon S3 Full Access option, and select it.
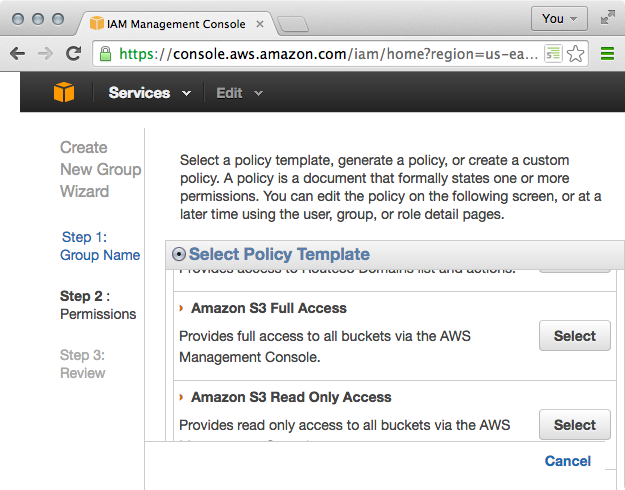
A screenshot of the Select Policy Template screen. - Adjust your policies here (or come back later when they make sense).
- Click the Next Step button, and Create Group.

This will return you to the IAM screen.
Creating an S3 user
Next, we need to set up an S3 user.
- Log in to the Amazon Web Services management console.
- Under the Deployment & Management column, click the IAM link.
- On the Welcome to Identity and Access Management screen, click, Users.
- Click Create New Users and add up to five user names.
- Make sure the Generate an access key for each user box is selected.
- Make a note of Access Key ID and Secret Access Key the credentials shown on the next page. Download those credentials as well, for safe keeping.
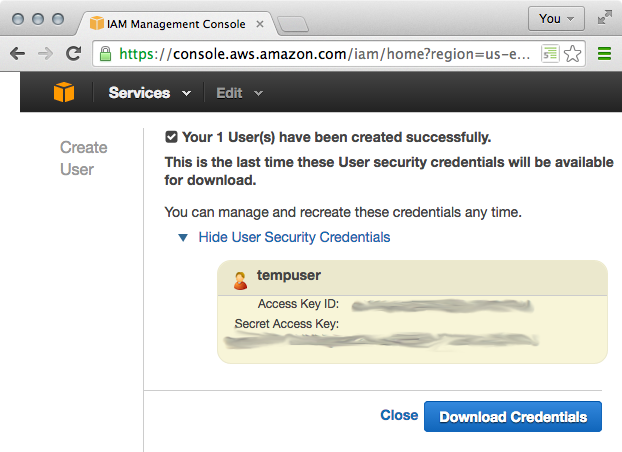
A screenshot of the credentials download screen from the Amazon Web Services management console.
Now we have a permissions group with access S3, and we have a user. Next we have to add our user to our S3 access group.
Adding the user to a permissions group
When you return to the list of users, select the user you just created.
- On the next screen, click the Add Users to Groups button.
- Check the box next to the S3 permissions group.
- Click Add to Groups.
Setting up Cyberduck
Setting up Cyberduck is the easiest part. You'll need the Amazon Access Key ID and Secret Key created during the Creating an S3 user process. Fire up Cyberduck, and follow these steps.
- Click the Open Connection button.
- In the connection dialog box, choose S3 from the drop-down menu.
- In the Username field, enter the Access Key ID of your S3 user. This is different than the name of the user, it is the Amazon-generated ID.
- In the Password field enter the Secret Access Key.
- Optionally, check the Add to Keychain box.
- Enter Connect.
Now you can use Cyberduck to upload files to your S3 buckets, adjust permissions, and modify file metadata such as HTTP response headers.